頁數 1 / 2
下一頁
搜尋 Button 結果:
<!DOCTYPE html>

<html lang="en">

<head>

    <meta charset="UTF-8">

    <meta name="viewport" content="width=device-width, initial-scale=1.0">

    <title>BLE Printer Test</title>

    <script src="https://cdn.jsdelivr.net/npm/iconv-lite-umd@0.6.10/lib/iconv-lite-umd.js"></script>

</head>

<body>

    <h1>BLE Printer Test 123</h1>

    <button id="printTestButton">Test Print</button>

    <button id="printAgain">Print Again</button>

    <pre id="log"></pre>

    <script>

        // Function to log messages on the page

        function logMessage(message) {

            const logElement = document.getElementById('log');

            logElement.textContent += message + '\n';

        }

        var device;

        var server;

        var service;

        var characteristic;

        var name = 'T58_6752'; // 藍芽設備的名稱

        var uuid = 0x1800; //service UUID (用 BLE Scanner 找到的)

        var characteristicUuid = 0x2A00; // characteristic UUID (用 BLE Scanner 找到的)

        // Function to connect to BLE printer and send test data


        async function connectAndTestPrint() {


            try {

                logMessage("Requesting Bluetooth device...");


                // Request the BLE device

                device = await navigator.bluetooth.requestDevice({

                    //acceptAllDevices: true,

                    filters: [

                        { name: name }

                    ],

                    optionalServices: [uuid] // Replace with the correct service UUID

                });


                logMessage(`Device selected: ${device.name}`);

                logMessage(`Device uuid: ${device.id}`);


                await printAgain();


            } catch (error) {

                logMessage(`Error: ${error.message}`);

            }

        }


        // 转码方法

        function stringToGbk(str) {

            const ranges = [

                [0xA1, 0xA9, 0xA1, 0xFE],

                [0xB0, 0xF7, 0xA1, 0xFE],

                [0x81, 0xA0, 0x40, 0xFE],

                [0xAA, 0xFE, 0x40, 0xA0],

                [0xA8, 0xA9, 0x40, 0xA0],

                [0xAA, 0xAF, 0xA1, 0xFE],

                [0xF8, 0xFE, 0xA1, 0xFE],

                [0xA1, 0xA7, 0x40, 0xA0],

            ]

            const codes = new Uint16Array(23940)

            let i = 0


            for (const [b1Begin, b1End, b2Begin, b2End] of ranges) {

                for (let b2 = b2Begin; b2 <= b2End; b2++) {

                    if (b2 !== 0x7F) {

                        for (let b1 = b1Begin; b1 <= b1End; b1++) {

                            codes[i++] = b2 << 8 | b1

                        }

                    }

                }

            }

            const cstr = new TextDecoder('gbk').decode(codes)


            // 编码表

            const table = new Uint16Array(65536)

            for (let i = 0; i < cstr.length; i++) {

                table[cstr.charCodeAt(i)] = codes[i]

            }

            const buf = new Uint8Array(str.length * 2)

            let n = 0


            for (let i = 0; i < str.length; i++) {

                const code = str.charCodeAt(i)

                if (code < 0x80) {

                    buf[n++] = code

                } else {

                    const gbk = table[code]

                    buf[n++] = gbk & 0xFF

                    buf[n++] = gbk >> 8

                }

            }

            u8buf = buf.subarray(0, n)

            // console.log(u8buf);

            return u8buf

        }


        async function printAgain() {

            // Connect to the GATT server

            server = await device.gatt.connect();

            logMessage("Connected to GATT server.");


            // Get the printer service

            service = await server.getPrimaryService(uuid); // Replace with your printer's service UUID

            logMessage("Printer service retrieved.");


            // Get the characteristic for writing data

            characteristic = await service.getCharacteristic(characteristicUuid); // Replace with the correct characteristic UUID

            logMessage("Printer characteristic retrieved.");


            // Prepare test print data

            const encoder = new TextEncoder();

            const testData = encoder.encode("TEST PRINT: Hello from Web Bluetooth!\n");

            const finalData = encoder.encode("--\n--\n \n \n");


            const setFontSize = new Uint8Array([0x1D, 0x21, 0x11]); // GS ! n

            const setFontSize2 = new Uint8Array([0x1D, 0x21, 0x22]); // GS ! n

            const setFontSize3 = new Uint8Array([0x1D, 0x21, 0x33]); // GS ! n


            // Write test data to the printer

            logMessage("Sending test data to printer...");


            await characteristic.writeValue(new Uint8Array([0x1D, 0x21, 0x00]));

            await characteristic.writeValue(encoder.encode("1x1!\n"));

            await characteristic.writeValue(setFontSize);

            await characteristic.writeValue(encoder.encode("2x2!\n"));

            await characteristic.writeValue(setFontSize2);

            await characteristic.writeValue(encoder.encode("3x3!\n"));

            await characteristic.writeValue(setFontSize3);

            await characteristic.writeValue(encoder.encode("4x4!\n"));


            const initPrinter = new Uint8Array([0x1B, 0x40]); // ESC @

            await characteristic.writeValue(initPrinter);


            // 3. 設置字符集為 GBK

            const setGBK = new Uint8Array([0x1B, 0x74, 0x11]); // ESC t 0x11 (GBK)

            await characteristic.writeValue(setGBK);


            const text = "繁體中文測試\n \n";

            const encodedText = stringToGbk(text);

            await characteristic.writeValue(encodedText);

            logMessage("Test data sent successfully!");


            // QrCode 列印

            const qrData = "https://example.com"; // Your QR code data

            const qrDataLength = qrData.length + 3;

            const pL = qrDataLength & 0xFF; // Low byte

            const pH = (qrDataLength >> 8) & 0xFF; // High byte


            const commands = [

                0x1B, 0x40, // Initialize printer

                0x1D, 0x28, 0x6B, pL, pH, 0x31, 0x50, 0x30, ...new TextEncoder().encode(qrData), // Store data

                0x1D, 0x28, 0x6B, 0x03, 0x00, 0x31, 0x51, 0x30 // Print QR code

            ];


            const buffer = new Uint8Array(commands);

            await characteristic.writeValue(buffer);

            logMessage("QrCode sent successfully!");


            await characteristic.writeValue(finalData);

            logMessage("finalData sent successfully!");


            // Disconnect the GATT server

            server.disconnect();

            logMessage("Disconnected from printer.");

        }


        // Bind the function to the button

        document.getElementById('printTestButton').addEventListener('click', connectAndTestPrint);

        document.getElementById('printAgain').addEventListener('click', printAgain);

    </script>

</body>

</html>
Bike, 2025/1/2 下午 02:20:15
Browser:
safari in iphone
chrome in iphone
chrome in android
in Line (APP)
in FB (APP)
HTML:
form target="_blank"
window.open
link target="_blank"
Trigger:
onclick in tag
.click with jquery
submit button
safari in iphone
chrome in iphone
chrome in android
in Line (APP)
in FB (APP)
HTML:
form target="_blank"
window.open
link target="_blank"
Trigger:
onclick in tag
.click with jquery
submit button
Bike, 2022/2/11 上午 09:13:12
有點怪的 bug, mobile 版的 slidesPerGroup 只能設為 1
    var slidesPerGroup = 5;

    if (S3JS.isMobile()) {

        slidesPerGroup = 1; // 很奇怪, Mobile 版時, 若是設定 slidesPerGroup = 5 時, 剛進入時會看到最後一組商品.

    }

    //beauty-coin-exchange-loading

    var swiperPreview = new Swiper('.beauty-coin-exchange-swiper', {

        slidesPerView: 5,

        slidesPerColumn: 1,

        slidesPerGroup: slidesPerGroup,

        spaceBetween: 0,

        loop: true,

        breakpoints: {

            768: {

                slidesPerView: 4.3,

                spaceBetween: 10,

            }

        },

        nextButton: '.beauty-coin-next',

        prevButton: '.beauty-coin-prev',

    });
Bike, 2019/11/22 下午 04:41:11
https://stackoverflow.com/questions/628565/display-lines-number-in-stack-trace-for-net-assembly-in-release-mode/628590#628590
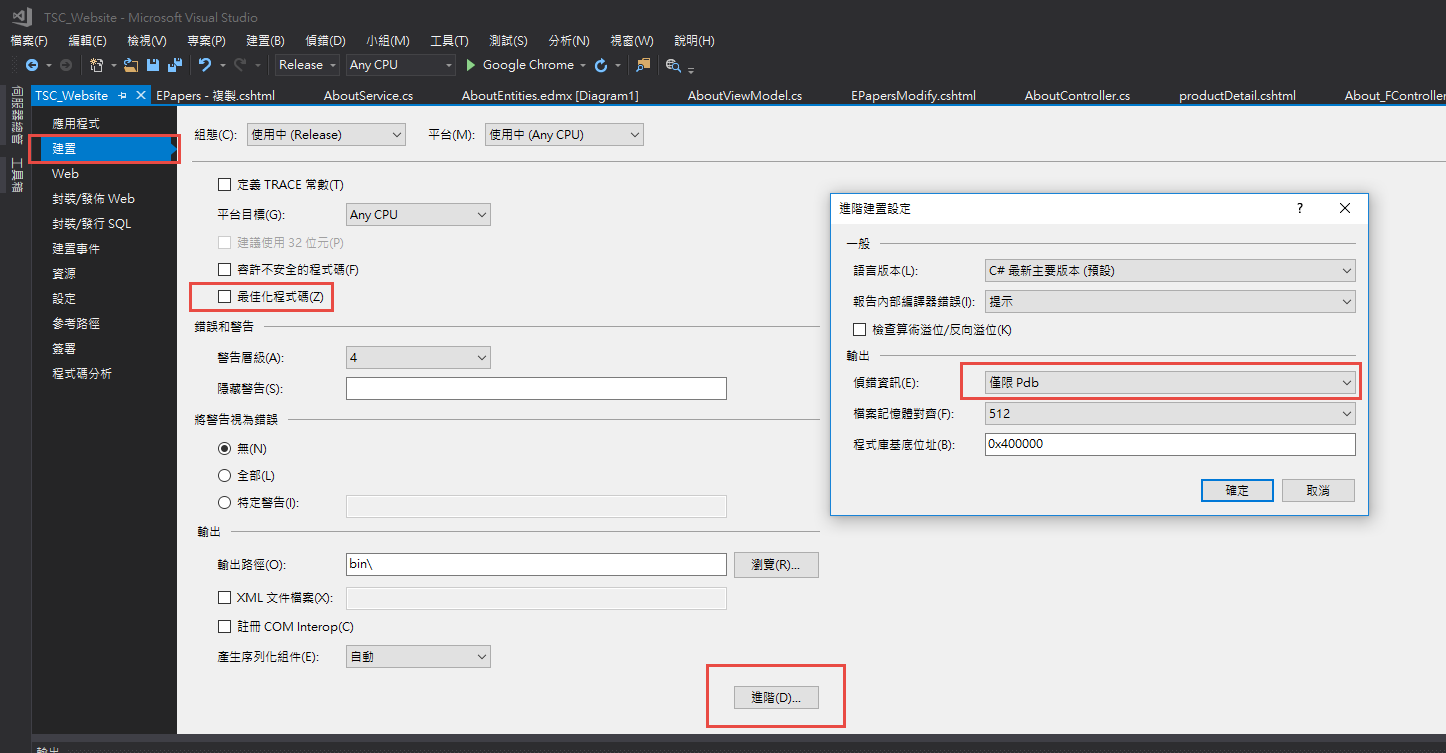
1. Go into the Properties window for the project where you want to see stack trace line numbers.
2. Click on the Build "vertical tab".
3. Select "Release" configuration.Check the DEBUG constant parameter.
4. Uncheck the "Optimize code" parameter to avoid the occasional trace issue with inlined code (this step is not essential).
5. Press the Advanced... button and choose Output -> Debug Info -> pdb-only.
6. Deploy the generated .pdb file with the assembly.
1. Go into the Properties window for the project where you want to see stack trace line numbers.
2. Click on the Build "vertical tab".
3. Select "Release" configuration.
4. Uncheck the "Optimize code" parameter to avoid the occasional trace issue with inlined code (this step is not essential).
5. Press the Advanced... button and choose Output -> Debug Info -> pdb-only.
6. Deploy the generated .pdb file with the assembly.
Bike, 2018/4/9 上午 09:40:12
改用javascript送出
相關專案: 光寶
<asp:Button ID="BtnSubmit" runat="server" Text="修改" OnClick="BtnSubmit_Click" OnClientClick="return formSubmit('true');" /><script type="text/javascript">
function formSubmit(val) {
if (val== "true")
{
form1.submit();
} else {
return false;
}
}
</script>
相關專案: 光寶
Reiko, 2015/6/29 下午 03:49:57
自製input 的 radio button 和 checkbox 之前常見的做法是,在input旁邊加入:not(old)的選擇器,如下所例 (以下寫法為SCSS格式)
但是chrome的新版本(39版)後開始,不能直接在input旁邊加:not(old),這段語法,點擊後,會無法正常顯示,所以解決的方法有兩個
1. 要使用:not(old)這段語法,不能在input旁邊加,必須是在他的外層上加,如下所例
2. 不使用:not(old),改用:not(:checked)寫法,Selectors 4也建議使用此語法,如下所例
input[type="radio"]:not(old){

width:28px;

margin:0;

padding:0;

@include opacity(0);

}

input[type="radio"]:not(old) + label{

display: inline-block;

margin-left: -28px;

padding-left: 18px;

background: url("//www.shopunt.com/images/eng/btn/radio.png") no-repeat;

width:auto;

line-height: 12px;

}

input[type="radio"]:not(old):checked + label{

background: url("//www.shopunt.com/images/eng/btn/radio-r.png") no-repeat;

width:auto;

}但是chrome的新版本(39版)後開始,不能直接在input旁邊加:not(old),這段語法,點擊後,會無法正常顯示,所以解決的方法有兩個
1. 要使用:not(old)這段語法,不能在input旁邊加,必須是在他的外層上加,如下所例
.r-btn:not(old){

    input[type="radio"]{

     width:28px;

     margin:0;

     padding:0;

     @include opacity(0);

    }

    input[type="radio"] + label{

     display: inline-block;

     margin-left: -28px;

     padding-left: 18px;

     background: url("//www.shopunt.com/images/eng/btn/radio.png") no-repeat;

     width:auto;

     line-height: 12px;

    }

    input[type="radio"]:checked + label{

     background: url("//www.shopunt.com/images/eng/btn/radio-r.png") no-repeat;

     width:auto;

    }

}
2. 不使用:not(old),改用:not(:checked)寫法,Selectors 4也建議使用此語法,如下所例
input[type="radio"]:not(:checked), input[type="radio"]:checked {

    position: absolute;

    left: -9999px;

}

input[type="radio"]:not(checked) + label{

display: inline-block;

margin-left: 4px;

padding-left: 18px;

background: url("//www.shopunt.com/images/eng/btn/radio.png") no-repeat;

width:auto;

line-height: 12px;

}

input[type="radio"]:checked + label{

background: url("//www.shopunt.com/images/eng/btn/radio-r.png") no-repeat;

width:auto;

}nelson, 2014/11/21 下午 07:04:21
由於偶爾會有需要在 <body> 最上方塞入一些 html
例如塞入一個要置頂的 div 區塊
目前這個區塊只有 {DebugMessage}
所以在 master.html 增加一個新的項目 叫做 <!--BodyTop-->
UW.TBase 增加一個 Public 變數 strBodyTop
如此一般網頁使用時 就可以置入置頂的內容 注意:是塞入html
使用上 於 PreRender 時
例如塞入一個要置頂的 div 區塊
目前這個區塊只有 {DebugMessage}
所以在 master.html 增加一個新的項目 叫做 <!--BodyTop-->
<body>
    <!--BodyTop-->
    {DebugMessage}
    <a id="anchorGoTop" href="#gotop" class="gotop" style="display: none;"><span><em></em></span></a>
UW.TBase 增加一個 Public 變數 strBodyTop
如此一般網頁使用時 就可以置入置頂的內容 注意:是塞入html
使用上 於 PreRender 時
        '購物button區塊置於 <body> 正下方
        Me.strBodyTop = Me.otContent.SubTemplate("BuyButtonArea").Result
就可以了
darren, 2014/6/20 上午 10:57:30
以前只是用 facebook 的server端 API 來處理登入
這次因為活動關係而純粹使用 JS SDK 來處理 user 的發文
這裡把一些用到 function 作整理
比較特別的是 FB.login 使用時機,因為他會 window.open 新視窗
若是 ajax 資料後再呼叫,通常會被瀏覽器檔下來
使用時機最好是user點了button後就直接執行
再補充一下,若只是單純分享網頁,可以使用 FB.ui,就不用管有無登入以及權限問題
這次因為活動關係而純粹使用 JS SDK 來處理 user 的發文
這裡把一些用到 function 作整理
比較特別的是 FB.login 使用時機,因為他會 window.open 新視窗
若是 ajax 資料後再呼叫,通常會被瀏覽器檔下來
使用時機最好是user點了button後就直接執行
//先檢查是不是已經登入

FB.getLoginStatus(function (response) {

    if (response.status === "connected") {

    // 已登入FB

    }

else {

        // 未登入FB

        // 盡量不要在此呼叫 FB.login , 因為彈跳視窗會被擋下來

}

});


//呼叫登入 scope:publish_stream 是要讓user同意發文到FB的權限

FB.login(function (response) {

    if (response.authResponse) {

        // 已登入,可取得 AccessToken

    } else {

        // 未登入

    }

}, { scope: 'publish_stream' });


// 檢查 user 有無同意發文到FB的權限 (publish_stream)

FB.api({ method: 'users.hasAppPermission', ext_perm: 'publish_stream' }, function (resp) {

    if (resp === "1") {

        //有同意

    } else {

        //不同意

    }

});


// 分享連結到登入者的FB牆

// msg 是發文的內容

// link, picture, caption, description 是一組的

var args = {

    message: msg,

    link: product.Link,

    picture: product.Picture,

    caption: product.Name,

    description: "超高口碑BB霜/CC霜、頂級精華液哪款半價 由你決定!"

};

FB.api('/me/feed', 'post', args, function (response) {

    if (response.id) {

        // 成功會回傳訊息id

    }

    else {

        // 分享失敗

    }

});
再補充一下,若只是單純分享網頁,可以使用 FB.ui,就不用管有無登入以及權限問題
    FB.ui({

        method: 'feed',

        name: '快去搶!超過9成的使用者滿意推薦的《玻尿酸精華》',

        link: 'http://www.shopunt.com/tch/event/2014-aqua-deluge/default.aspx',

        picture: 'http://www.shopunt.com/Upload/tch/unt/14mar/fb154x154.jpg',

        caption: 'UNT 頂級玻尿酸保濕精華液(奢華)',

        description: '熱銷破百萬 真實口碑見證的水感奇肌 逆時補水科技 快速滲透 為肌膚注入高水位……'

    },

        function (response) {

            if (response && response.post_id) {

                // handle  success

            }

            else {

                alert("facebook分享失敗!");

            }

        }

    );
darren, 2014/3/3 上午 10:06:40
popUp先前就已經有在使用了~
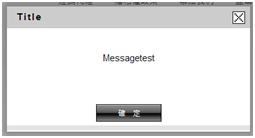
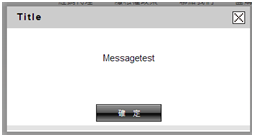
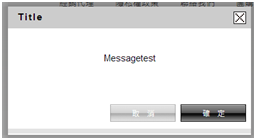
但是原本的功能只能輸入 Title 和 Message
並且版面上都很固定,例如有沒有確定按鈕、取消按鈕、是否要顯示Title的是固定的~
因此改出下列版本~
popUp: function (Title, Message, Width, Height, hasbtnclose, hasbtnOK, hasbtnCancel, fuclose, fuOK, fuCancel)
格式講解:
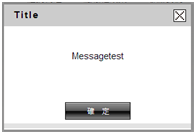
Title:不輸入或者輸入空字串,則不會顯示Title(p1)(p2)


Message:中間的文字
Width:可自行輸入,輸入0則表示使用預設值390,不建議自行調整會有瀏覽器版本問題。
Height:可自行輸入,輸入0則表示用預設,會自動拉開高度。
hasbtnclose:true / false

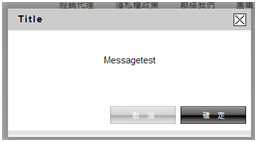
hasbtnOK:true / false
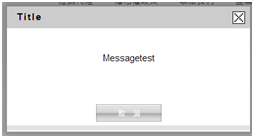

hasbtnCancel:true / false
fuclose, fuOK, fuCancel分別是指按鈕按下去之後要執行的onclick,切記,無法使用雙引號
文件參考位置
http://localhost:2874/WWW20/scripts/Merge/Common.js
darren 補充:
我改一下標題 讓大家比較清楚這篇文章的主旨
建議可以把 arguments 改成一般 options 物件寫法
但是原本的功能只能輸入 Title 和 Message
並且版面上都很固定,例如有沒有確定按鈕、取消按鈕、是否要顯示Title的是固定的~
因此改出下列版本~
popUp: function (Title, Message, Width, Height, hasbtnclose, hasbtnOK, hasbtnCancel, fuclose, fuOK, fuCancel)
格式講解:
Title:不輸入或者輸入空字串,則不會顯示Title(p1)(p2)
Message:中間的文字
Width:可自行輸入,輸入0則表示使用預設值390,不建議自行調整會有瀏覽器版本問題。
Height:可自行輸入,輸入0則表示用預設,會自動拉開高度。
hasbtnclose:true / false
hasbtnOK:true / false
hasbtnCancel:true / false
fuclose, fuOK, fuCancel分別是指按鈕按下去之後要執行的onclick,切記,無法使用雙引號
文件參考位置
http://localhost:2874/WWW20/scripts/Merge/Common.js
darren 補充:
我改一下標題 讓大家比較清楚這篇文章的主旨
建議可以把 arguments 改成一般 options 物件寫法
// 例如

Common.popUp({

    Title: "....",

    Message: "......."

    .....

    onOKClick: function() {

        // handle onclick ok button event

    },

    onCancelClick: function() {

        // handle onclick cancel button event

    }

});
Doug, 2014/2/27 上午 10:16:34
Windows 2008 的 SMTP 寄信時若遇到 "Helo command rejected: need fully-qualified hostname" ,可做以下的修改。
The fix is easy:
- Open IIS
- View the properties of you Default SMTP Virtual Server
- Go to the “Delivery” tab
- Click the “Advanced” button (in the bottom right corner)
- Under “Fully-qualified domain name” enter a domain name that points to the server
- Click Ok until you’re back to IIS
Bike, 2013/10/28 上午 09:50:56