頁數 1 / 5
下一頁
搜尋 for 結果:
因為想把同一網站下的靜態檔用另一個 domain 處理
但是 css 如果有設定下載字型檔 .ttf or .woff
就會出現 CORS 問題,其他 js, css,圖片就能正常
為了解決CORS的問題,其實只要 Response Header 要設定 Access-Control-Allow-Origin: *
或是設定特定網站 Access-Control-Allow-Origin: https://www.s3.com.tw
後來發現 IIS 網站可以設定 web.config 設定 response header 解決
當然要先裝一下 urlrewrite 2.0 才可以使用
只針對 font 類型的靜態檔
{REQUEST_URI} 也可以改為 {PATH_INFO}
但是 css 如果有設定下載字型檔 .ttf or .woff
就會出現 CORS 問題,其他 js, css,圖片就能正常
為了解決CORS的問題,其實只要 Response Header 要設定 Access-Control-Allow-Origin: *
或是設定特定網站 Access-Control-Allow-Origin: https://www.s3.com.tw
後來發現 IIS 網站可以設定 web.config 設定 response header 解決
當然要先裝一下 urlrewrite 2.0 才可以使用
只針對 font 類型的靜態檔
<configuration>

<system.webServer>

    <rewrite>

     <outboundRules>

        <rule name="Add CORS header for fonts" preCondition="IsFontFile">

         <match serverVariable="RESPONSE_Access-Control-Allow-Origin" pattern=".*" />

         <action type="Rewrite" value="*" />

        </rule>

        <preConditions>

         <preCondition name="IsFontFile">

            <add input="{REQUEST_URI}" pattern="\.woff2$|\.woff$|\.ttf$|\.eot$|\.otf$" />

         </preCondition>

        </preConditions>

     </outboundRules>

    </rewrite>

</system.webServer>

</configuration>
{REQUEST_URI} 也可以改為 {PATH_INFO}
darren, 2026/3/4 下午 05:02:35
由實體機追查哪一台 VM 的流量最大
# 抓取第一次數據
$before = Get-Counter -Counter @(
'\Hyper-V Virtual Network Adapter(*)\Bytes Sent/sec',
'\Hyper-V Virtual Network Adapter(*)\Bytes Received/sec'
)
# 等待 10 秒
Start-Sleep -Seconds 10
# 抓取第二次數據
$after = Get-Counter -Counter @(
'\Hyper-V Virtual Network Adapter(*)\Bytes Sent/sec',
'\Hyper-V Virtual Network Adapter(*)\Bytes Received/sec'
)
# 分析並計算平均每秒流量
$results = @()
for ($i = 0; $i -lt $before.CounterSamples.Count; $i++) {
$instance = $before.CounterSamples[$i].InstanceName
$sentIndex = $i
$recvIndex = $i + $before.CounterSamples.Count / 2
$sentBefore = $before.CounterSamples[$sentIndex].CookedValue
$sentAfter = $after.CounterSamples[$sentIndex].CookedValue
$recvBefore = $before.CounterSamples[$recvIndex].CookedValue
$recvAfter = $after.CounterSamples[$recvIndex].CookedValue
$sentPerSec = ($sentAfter - $sentBefore) / 10
$recvPerSec = ($recvAfter - $recvBefore) / 10
$results += [PSCustomObject]@{
AdapterName = $instance
SentPerSec = [math]::Round($sentPerSec, 2)
ReceivedPerSec = [math]::Round($recvPerSec, 2)
TotalPerSec = [math]::Round($sentPerSec + $recvPerSec, 2)
}
}
# 顯示結果,依照總流量排序
$results | Sort-Object TotalPerSec -Descending | Format-Table -AutoSize
用 performance monitor 監查看各VM的流量(找不到)
Get-Counter '\Hyper-V Virtual Network Adapter(*)\Bytes Total/sec'
在 VM 上追查哪個網站流量最大
用 performance monitor 監查看各網站的流量
Web Service: Bytes Sent/sec
Bike, 2025/8/4 上午 11:11:06
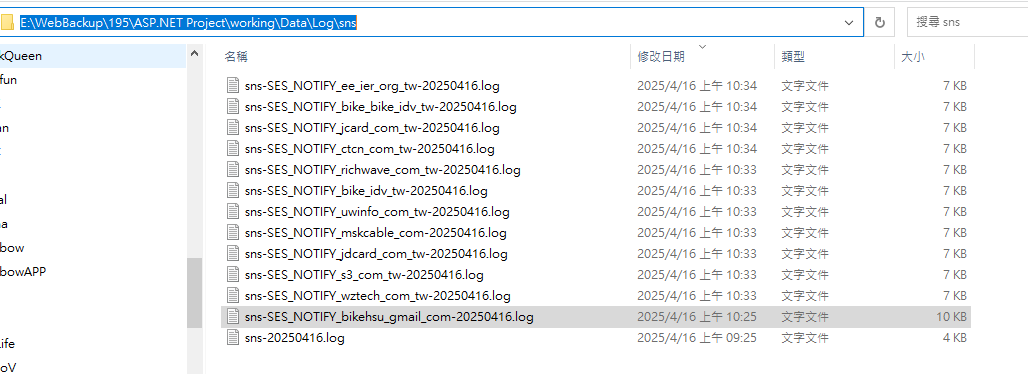
在 powershell 執行以下的指令
收到的 log 會放在這裡: E:\WebBackup\195\ASP.NET Project\working\Data\Log\sns
# List of SES identities

$identities = @(

    "wztech.com.tw",

    "s3.com.tw",

    "jdcard.com.tw",

    "mskcable.com",

    "uwinfo.com.tw",

    "bike.idv.tw",

    "richwave.com.tw",

    "ctcn.com.tw",

    "jcard.com.tw",

    "bike@bike.idv.tw",

    "ee@ier.org.tw"

)


foreach ($identity in $identities) {

    # Convert identity to a valid topic name by replacing '@' and '.' with '_'

    $safeIdentity = $identity -replace "@", "_" -replace "\.", "_"

    $topicName = "SES_NOTIFY_$safeIdentity"

    $endpoint = "https://working.uwinfo.com.tw/aws/api/sns/receive?topic=$topicName"


    # Validate topic name format

    if ($topicName -notmatch '^[a-zA-Z0-9_\-\$]+$') {

        Write-Host "❌ Invalid topic name: $topicName"

        continue

    }


    # 1. Create SNS topic

    $topicArn = aws sns create-topic `

        --name $topicName `

        --query 'TopicArn' `

        --output text


    Write-Host "✔ Created topic: $topicArn"


    # 2. Subscribe webhook

    aws sns subscribe `

        --topic-arn $topicArn `

        --protocol https `

        --notification-endpoint $endpoint


    Write-Host "✔ Subscribed webhook: $endpoint"


    # 3. Link SES notifications

    foreach ($type in @("Delivery", "Bounce", "Complaint")) {

        aws ses set-identity-notification-topic `

            --identity $identity `

            --notification-type $type `

            --sns-topic $topicArn

        Write-Host "✔ $type linked to $topicName"

    }


    Write-Host "✅ Setup complete for $identity\n"

}


Write-Host "🎉 All identities processed."
收到的 log 會放在這裡: E:\WebBackup\195\ASP.NET Project\working\Data\Log\sns
Bike, 2025/4/16 上午 10:40:39
在 powershell 執行以下的指令
# List of SES identities
$identities = @(
"wztech.com.tw",
"s3.com.tw",
"jdcard.com.tw",
"mskcable.com",
"uwinfo.com.tw",
"bike.idv.tw",
"richwave.com.tw",
"ctcn.com.tw",
"jcard.com.tw",
"bike@bike.idv.tw",
"ee@ier.org.tw"
)
foreach ($identity in $identities) {
# Convert identity to a valid topic name by replacing '@' and '.' with '_'
$safeIdentity = $identity -replace "@", "_" -replace "\.", "_"
$topicName = "SES_NOTIFY_$safeIdentity"
$endpoint = "https://working.uwinfo.com.tw/aws/api/sns/receive?topic=$topicName"
# Validate topic name format
if ($topicName -notmatch '^[a-zA-Z0-9_\-\$]+$') {
Write-Host "❌ Invalid topic name: $topicName"
continue
}
# 1. Create SNS topic
$topicArn = aws sns create-topic `
--name $topicName `
--query 'TopicArn' `
--output text
Write-Host "✔ Created topic: $topicArn"
# 2. Subscribe webhook
aws sns subscribe `
--topic-arn $topicArn `
--protocol https `
--notification-endpoint $endpoint
Write-Host "✔ Subscribed webhook: $endpoint"
# 3. Link SES notifications
foreach ($type in @("Delivery", "Bounce", "Complaint")) {
aws ses set-identity-notification-topic `
--identity $identity `
--notification-type $type `
--sns-topic $topicArn
Write-Host "✔ $type linked to $topicName"
}
Write-Host "✅ Setup complete for $identity\n"
}
Write-Host "🎉 All identities processed."
--
收到的 log 會放在這裡: E:\WebBackup\195\ASP.NET Project\working\Data\Log\sns
Bike, 2025/4/16 上午 10:40:31
IIS 如果要使用 reverse proxy server 服務,其實網路上已經有很多文章可以參考
這篇文章只是記錄一下安裝上要注意的事
過去安裝 IIS 套件 可以透過 Web Platform Installer 搜尋下載
但現在 IIS 的 Web Platform Installer 已經不讓人搜尋下載可安裝的套件
所以要直接去微軟網站找相關套件 可以用 IIS ARR 搜尋
https://www.iis.net/downloads/microsoft/application-request-routing
下載 requestRouter_amd64.msi 安裝這個 (3.0版 2021 年以後就沒有更新了)
安裝前,IIS也要預先安裝 URLRewrite 2 套件
安裝很簡單,msi 安裝後,IIS重啟就可以看到
IIS 的主機設定,可以看到 "Application Reuest Routing Cache" --> 點進後右邊有 Server Proxy Settings
proxy 的設定有一些地方要注意一下,避免未來採到雷
首先 當然先開啟 Enable proxy,下面針對一些要注意的屬性說明一下
1. Time-out : 預設120秒,如果你後端的站台有一些操作可能超過兩分鐘(例如處理報表),這個就調長一點
2. Reverse rewrite host in response header: 這個勾勾預設是開的,他的好意是同站台redirect(302) 到其他網頁,可以覆蓋
host 讓 client端能跑到正常的網址。但如果你是 redirect 到其他站台,建議把它關掉,不然後端網站如果下
redirect (302) 到別的站台,他會主動把 redirect網址 host 改為本站 (被雷過,所以要特別記下來)
3. Include TCP port from client IP: 這是一個 X-Forwarded-For 設定,預設是打開,這樣後端主機抓 client 來源 IP就會類似
"112.121.100.100:443" ,但後端網站在抓 client端IP通常不會管 port number,因此就會造成比對 IP 發生錯誤
所以建議還是把它關閉
4. Enable disk cache: 預設是勾勾打開,如果後端是靜態網站,例如圖片server,這個打開沒有問題,但如果後端網站是動態網站
那還是關掉
darren, 2025/1/10 上午 11:01:38
<!DOCTYPE html>

<html lang="en">

<head>

    <meta charset="UTF-8">

    <meta name="viewport" content="width=device-width, initial-scale=1.0">

    <title>BLE Printer Test</title>

    <script src="https://cdn.jsdelivr.net/npm/iconv-lite-umd@0.6.10/lib/iconv-lite-umd.js"></script>

</head>

<body>

    <h1>BLE Printer Test 123</h1>

    <button id="printTestButton">Test Print</button>

    <button id="printAgain">Print Again</button>

    <pre id="log"></pre>

    <script>

        // Function to log messages on the page

        function logMessage(message) {

            const logElement = document.getElementById('log');

            logElement.textContent += message + '\n';

        }

        var device;

        var server;

        var service;

        var characteristic;

        var name = 'T58_6752'; // 藍芽設備的名稱

        var uuid = 0x1800; //service UUID (用 BLE Scanner 找到的)

        var characteristicUuid = 0x2A00; // characteristic UUID (用 BLE Scanner 找到的)

        // Function to connect to BLE printer and send test data


        async function connectAndTestPrint() {


            try {

                logMessage("Requesting Bluetooth device...");


                // Request the BLE device

                device = await navigator.bluetooth.requestDevice({

                    //acceptAllDevices: true,

                    filters: [

                        { name: name }

                    ],

                    optionalServices: [uuid] // Replace with the correct service UUID

                });


                logMessage(`Device selected: ${device.name}`);

                logMessage(`Device uuid: ${device.id}`);


                await printAgain();


            } catch (error) {

                logMessage(`Error: ${error.message}`);

            }

        }


        // 转码方法

        function stringToGbk(str) {

            const ranges = [

                [0xA1, 0xA9, 0xA1, 0xFE],

                [0xB0, 0xF7, 0xA1, 0xFE],

                [0x81, 0xA0, 0x40, 0xFE],

                [0xAA, 0xFE, 0x40, 0xA0],

                [0xA8, 0xA9, 0x40, 0xA0],

                [0xAA, 0xAF, 0xA1, 0xFE],

                [0xF8, 0xFE, 0xA1, 0xFE],

                [0xA1, 0xA7, 0x40, 0xA0],

            ]

            const codes = new Uint16Array(23940)

            let i = 0


            for (const [b1Begin, b1End, b2Begin, b2End] of ranges) {

                for (let b2 = b2Begin; b2 <= b2End; b2++) {

                    if (b2 !== 0x7F) {

                        for (let b1 = b1Begin; b1 <= b1End; b1++) {

                            codes[i++] = b2 << 8 | b1

                        }

                    }

                }

            }

            const cstr = new TextDecoder('gbk').decode(codes)


            // 编码表

            const table = new Uint16Array(65536)

            for (let i = 0; i < cstr.length; i++) {

                table[cstr.charCodeAt(i)] = codes[i]

            }

            const buf = new Uint8Array(str.length * 2)

            let n = 0


            for (let i = 0; i < str.length; i++) {

                const code = str.charCodeAt(i)

                if (code < 0x80) {

                    buf[n++] = code

                } else {

                    const gbk = table[code]

                    buf[n++] = gbk & 0xFF

                    buf[n++] = gbk >> 8

                }

            }

            u8buf = buf.subarray(0, n)

            // console.log(u8buf);

            return u8buf

        }


        async function printAgain() {

            // Connect to the GATT server

            server = await device.gatt.connect();

            logMessage("Connected to GATT server.");


            // Get the printer service

            service = await server.getPrimaryService(uuid); // Replace with your printer's service UUID

            logMessage("Printer service retrieved.");


            // Get the characteristic for writing data

            characteristic = await service.getCharacteristic(characteristicUuid); // Replace with the correct characteristic UUID

            logMessage("Printer characteristic retrieved.");


            // Prepare test print data

            const encoder = new TextEncoder();

            const testData = encoder.encode("TEST PRINT: Hello from Web Bluetooth!\n");

            const finalData = encoder.encode("--\n--\n \n \n");


            const setFontSize = new Uint8Array([0x1D, 0x21, 0x11]); // GS ! n

            const setFontSize2 = new Uint8Array([0x1D, 0x21, 0x22]); // GS ! n

            const setFontSize3 = new Uint8Array([0x1D, 0x21, 0x33]); // GS ! n


            // Write test data to the printer

            logMessage("Sending test data to printer...");


            await characteristic.writeValue(new Uint8Array([0x1D, 0x21, 0x00]));

            await characteristic.writeValue(encoder.encode("1x1!\n"));

            await characteristic.writeValue(setFontSize);

            await characteristic.writeValue(encoder.encode("2x2!\n"));

            await characteristic.writeValue(setFontSize2);

            await characteristic.writeValue(encoder.encode("3x3!\n"));

            await characteristic.writeValue(setFontSize3);

            await characteristic.writeValue(encoder.encode("4x4!\n"));


            const initPrinter = new Uint8Array([0x1B, 0x40]); // ESC @

            await characteristic.writeValue(initPrinter);


            // 3. 設置字符集為 GBK

            const setGBK = new Uint8Array([0x1B, 0x74, 0x11]); // ESC t 0x11 (GBK)

            await characteristic.writeValue(setGBK);


            const text = "繁體中文測試\n \n";

            const encodedText = stringToGbk(text);

            await characteristic.writeValue(encodedText);

            logMessage("Test data sent successfully!");


            // QrCode 列印

            const qrData = "https://example.com"; // Your QR code data

            const qrDataLength = qrData.length + 3;

            const pL = qrDataLength & 0xFF; // Low byte

            const pH = (qrDataLength >> 8) & 0xFF; // High byte


            const commands = [

                0x1B, 0x40, // Initialize printer

                0x1D, 0x28, 0x6B, pL, pH, 0x31, 0x50, 0x30, ...new TextEncoder().encode(qrData), // Store data

                0x1D, 0x28, 0x6B, 0x03, 0x00, 0x31, 0x51, 0x30 // Print QR code

            ];


            const buffer = new Uint8Array(commands);

            await characteristic.writeValue(buffer);

            logMessage("QrCode sent successfully!");


            await characteristic.writeValue(finalData);

            logMessage("finalData sent successfully!");


            // Disconnect the GATT server

            server.disconnect();

            logMessage("Disconnected from printer.");

        }


        // Bind the function to the button

        document.getElementById('printTestButton').addEventListener('click', connectAndTestPrint);

        document.getElementById('printAgain').addEventListener('click', printAgain);

    </script>

</body>

</html>
Bike, 2025/1/2 下午 02:20:15
PromiseAll: async function (array) {

    let taskList = [];

    let propList = [];

    for (let obj of array) {

        for (let prop in obj) {

            taskList.push(obj[prop]);

            propList.push(prop);

        }

    }

    let resp = await Promise.all(taskList);

    let result = {};

    let counter = 0;

    for (let prop of propList) {

        result[prop] = resp[counter];

        counter += 1;

    }

    return result;

}
PromiseAll 是將API一次發送並接收回傳值的工具
使用方法範例:
const taskList = [{

    adPosition : BannerPositionDataService.GetList(),

    big : BannerDataService.GetList(100),

    smallTop : BannerDataService.GetOne(200),

    smallBottom : BannerDataService.GetOne(300),

    section2 : BannerDataService.GetList(400),

    section3 : BannerDataService.GetList(500),

    section4 : BannerDataService.GetList(600),

    recommends : ProductDataService.GetRndList()

}];


let resps = await UJ.PromiseAll(taskList);
要特別記得TaskList中的Method不需要做await,不然就沒有意義了
DeepBinding: function (vueData, data) {


    if (Array.isArray(data)) {

        if (!Array.isArray(vueData)) {

            vueData = [];

        } else {

            vueData.splice(0);

        }

        for (let prop in data) {

            vueData.push(data[prop]);

        }

    }

    else if (typeof (data) === 'object') {

        if (Object.keys(data).length === 0) {

            return;

        }

        for (let prop in data) {

            if (vueData[prop] === undefined || data[prop] === null ||

                (!Array.isArray(vueData[prop] && vueData !== null && typeof (data) !== 'object'))) {

                vueData[prop] = data[prop];

            } else {

                this.DeepBinding(vueData[prop], data[prop]);

            }

        }

    } else {

        vueData = data;

    }

}
在資料回傳後要Binding到Vue Data上面或是任意Object的Property上可以使用這個,
不使用DeepBinding是因為瀏覽器版本限制,這個方式不受瀏覽器版本限制,但是只有提供一階,需要多階請自行改寫.
使用方法範例:
UJ.DeepBinding(this, resp);
這邊的this代表的是Vue的Data
梨子, 2023/11/24 上午 11:05:08
改寫成可輸入多參數,效能也比較好的版本。
以下為測試碼,請自行依照專案需求做修改。
以下為測試碼,請自行依照專案需求做修改。
var root = "C://wdqd/qwewq";

var addPath = @"//\\/fwef/qwf";

var addPath2 = @"5fwfef/qwf";

var addPath3 = @"//fwef/qwf";

var addPath4 = @"\\\fwef/qwf";

var addPath5 = @"\\\\\/fwef/qwf";


var result = root.AddPath(addPath, addPath2, addPath3, addPath4, addPath5);


Console.WriteLine(result);


public static class Helper

{

    public static string AddPath(this string value, params string[] addPaths)

    {

        if (string.IsNullOrEmpty(value))

        {

            throw new Exception("起始目錄不可以為空字串");

        }


        if (value.Contains("..") || addPaths.Any(x => x.Contains("..")))

        {

            throw new Exception($"value: {value}, addPaths: {addPaths.Where(x => x.Contains("..")).ToOneString()} 檔名與路徑不可包含 ..");

        }


        var paths = addPaths.Select(x => x.Substring(x.FindLastContinuousCharPosition('/', '\\') + 1).SafeFilename()).ToList();


        if (paths.Any(x => System.IO.Path.IsPathRooted(x)))

        {

            throw new Exception("不可併入完整路徑 ..");

        }


        paths.Insert(0, value.SafeFilename());


        return System.IO.Path.Combine(paths.ToArray());

    }


    public static string ToOneString<T>(this IEnumerable<T> list, string separator = ",")

    {

        var strList = list.Select(x => x.ToString());

        return string.Join(separator, strList);

    }


    public static int FindLastContinuousCharPosition(this string input, params char[] targets)

    {

        int lastPosition = -1;


        for (int i = 0; i < input.Length; i++)

        {

            if (targets.Contains(input[i]))

            {

                lastPosition = i;

            }

            else

            {

                break;

            }

        }


        return lastPosition;

    }


    public static string SafeFilename(this string value)

    {

        return GetValidFilename(value);

    }


    public static string GetValidFilename(string value)

    {

        string ValidFilenameCharacters = @"0123456789abcdefghijklmnopqrstuvwxyzABCDEFGHIJKLMNOPQRSTUVWXYZ\-_$.@:/# ";

        if (value.Contains(".."))

        {

            throw new Exception("路徑中不可包含 .. ");

        }


        string newUrl = "";

        for (int i = 0; i < value.Length; i++)

        {

            var c = value.Substring(i, 1);

            int k = ValidFilenameCharacters.IndexOf(c);

            if (k < 0)

            {

                throw new Exception($"檔名 '{value}' 中有非法的字元 '" + c + "'。");

            }

            newUrl += ValidFilenameCharacters.Substring(k, 1);

        }


        return newUrl;

    }

}
梨子, 2023/8/28 上午 09:43:49
問題:
在開出新分頁後,無法讀取 sessionStorage 的資料
可能原因:
Chrome 某個版本,Stop cloning sessionStorage for windows opened with noopener
a标签_blank默认 rel="noopener" ,所以a标签需要加入rel=“opener” 而才能像window.open("同源页面")这种方式新开的页面会复制之前的sessionStorage
解決方法:
開新分頁前,加入 rel=“opener”參數即可。
例:
參考:
面试官:你确定多窗口之间sessionStorage不能共享状态吗???
在開出新分頁後,無法讀取 sessionStorage 的資料
可能原因:
Chrome 某個版本,Stop cloning sessionStorage for windows opened with noopener
a标签_blank默认 rel="noopener" ,所以a标签需要加入rel=“opener” 而才能像window.open("同源页面")这种方式新开的页面会复制之前的sessionStorage
解決方法:
開新分頁前,加入 rel=“opener”參數即可。
例:
<a href="http://..." target="_blank" rel="opener">Link</a>
$(".hlkPrint").click(function () {

    $("form").setPostDataToStorage();


    $("form").attr("rel", "opener");

    $("form").attr("target", "_blank");

    $("form").attr("action", "xxxxx.aspx");

    $("form").submit();

});
參考:
面试官:你确定多窗口之间sessionStorage不能共享状态吗???
Reiko, 2022/12/1 下午 05:57:23
-- 自動更新某個欄位
CREATE OR REPLACE FUNCTION before_market_update ()
RETURNS TRIGGER AS
$$
BEGIN
NEW.LMDT = LocalTimeStamp;
RETURN NEW;
END;
$$
LANGUAGE 'plpgsql';
CREATE TRIGGER updt_market
BEFORE UPDATE
ON "Market"
FOR EACH ROW
EXECUTE PROCEDURE before_market_update();
CREATE OR REPLACE FUNCTION before_market_update ()
RETURNS TRIGGER AS
$$
BEGIN
NEW.LMDT = LocalTimeStamp;
RETURN NEW;
END;
$$
LANGUAGE 'plpgsql';
CREATE TRIGGER updt_market
BEFORE UPDATE
ON "Market"
FOR EACH ROW
EXECUTE PROCEDURE before_market_update();
Bike, 2022/8/12 下午 09:25:57