頁數 1 / 9
下一頁
搜尋 CS 結果:
因為想把同一網站下的靜態檔用另一個 domain 處理
但是 css 如果有設定下載字型檔 .ttf or .woff
就會出現 CORS 問題,其他 js, css,圖片就能正常
為了解決CORS的問題,其實只要 Response Header 要設定 Access-Control-Allow-Origin: *
或是設定特定網站 Access-Control-Allow-Origin: https://www.s3.com.tw
後來發現 IIS 網站可以設定 web.config 設定 response header 解決
當然要先裝一下 urlrewrite 2.0 才可以使用
只針對 font 類型的靜態檔
{REQUEST_URI} 也可以改為 {PATH_INFO}
但是 css 如果有設定下載字型檔 .ttf or .woff
就會出現 CORS 問題,其他 js, css,圖片就能正常
為了解決CORS的問題,其實只要 Response Header 要設定 Access-Control-Allow-Origin: *
或是設定特定網站 Access-Control-Allow-Origin: https://www.s3.com.tw
後來發現 IIS 網站可以設定 web.config 設定 response header 解決
當然要先裝一下 urlrewrite 2.0 才可以使用
只針對 font 類型的靜態檔
<configuration>

<system.webServer>

    <rewrite>

     <outboundRules>

        <rule name="Add CORS header for fonts" preCondition="IsFontFile">

         <match serverVariable="RESPONSE_Access-Control-Allow-Origin" pattern=".*" />

         <action type="Rewrite" value="*" />

        </rule>

        <preConditions>

         <preCondition name="IsFontFile">

            <add input="{REQUEST_URI}" pattern="\.woff2$|\.woff$|\.ttf$|\.eot$|\.otf$" />

         </preCondition>

        </preConditions>

     </outboundRules>

    </rewrite>

</system.webServer>

</configuration>
{REQUEST_URI} 也可以改為 {PATH_INFO}
darren, 2026/3/4 下午 05:02:35
Line 登入時,若是指定了 bot_prompt=aggressive ,但沒有在 Login Channel 指定相對應的 Official Account ,就會看到 "由於無法取得官方帳號的資訊,因此無法新增好友。" 的錯誤訊息,如下圖:
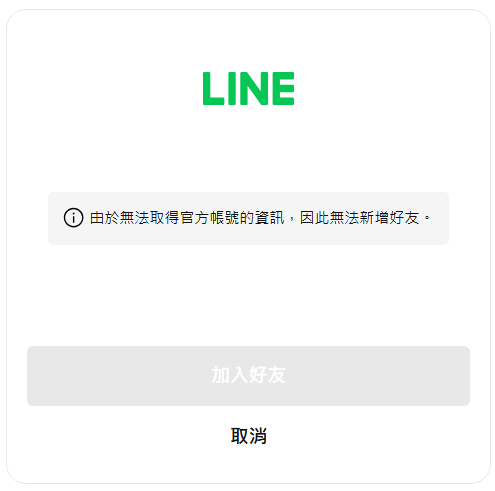
此時要去 Line Login Channel 的 Add friend option 中,指定 Linked LINE Official Account,如下圖: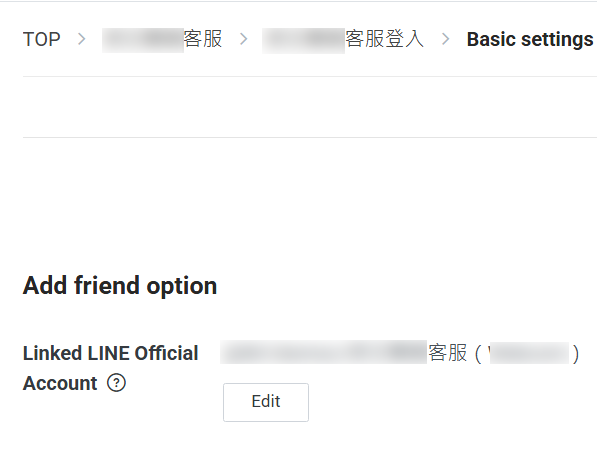
可參考: https://developers.line.biz/en/docs/line-login/link-a-bot/#link-a-line-official-account
此時要去 Line Login Channel 的 Add friend option 中,指定 Linked LINE Official Account,如下圖:
可參考: https://developers.line.biz/en/docs/line-login/link-a-bot/#link-a-line-official-account
Bike, 2025/2/25 上午 08:09:03
<!DOCTYPE html>

<html lang="en">

<head>

    <meta charset="UTF-8">

    <meta name="viewport" content="width=device-width, initial-scale=1.0">

    <title>BLE Printer Test</title>

    <script src="https://cdn.jsdelivr.net/npm/iconv-lite-umd@0.6.10/lib/iconv-lite-umd.js"></script>

</head>

<body>

    <h1>BLE Printer Test 123</h1>

    <button id="printTestButton">Test Print</button>

    <button id="printAgain">Print Again</button>

    <pre id="log"></pre>

    <script>

        // Function to log messages on the page

        function logMessage(message) {

            const logElement = document.getElementById('log');

            logElement.textContent += message + '\n';

        }

        var device;

        var server;

        var service;

        var characteristic;

        var name = 'T58_6752'; // 藍芽設備的名稱

        var uuid = 0x1800; //service UUID (用 BLE Scanner 找到的)

        var characteristicUuid = 0x2A00; // characteristic UUID (用 BLE Scanner 找到的)

        // Function to connect to BLE printer and send test data


        async function connectAndTestPrint() {


            try {

                logMessage("Requesting Bluetooth device...");


                // Request the BLE device

                device = await navigator.bluetooth.requestDevice({

                    //acceptAllDevices: true,

                    filters: [

                        { name: name }

                    ],

                    optionalServices: [uuid] // Replace with the correct service UUID

                });


                logMessage(`Device selected: ${device.name}`);

                logMessage(`Device uuid: ${device.id}`);


                await printAgain();


            } catch (error) {

                logMessage(`Error: ${error.message}`);

            }

        }


        // 转码方法

        function stringToGbk(str) {

            const ranges = [

                [0xA1, 0xA9, 0xA1, 0xFE],

                [0xB0, 0xF7, 0xA1, 0xFE],

                [0x81, 0xA0, 0x40, 0xFE],

                [0xAA, 0xFE, 0x40, 0xA0],

                [0xA8, 0xA9, 0x40, 0xA0],

                [0xAA, 0xAF, 0xA1, 0xFE],

                [0xF8, 0xFE, 0xA1, 0xFE],

                [0xA1, 0xA7, 0x40, 0xA0],

            ]

            const codes = new Uint16Array(23940)

            let i = 0


            for (const [b1Begin, b1End, b2Begin, b2End] of ranges) {

                for (let b2 = b2Begin; b2 <= b2End; b2++) {

                    if (b2 !== 0x7F) {

                        for (let b1 = b1Begin; b1 <= b1End; b1++) {

                            codes[i++] = b2 << 8 | b1

                        }

                    }

                }

            }

            const cstr = new TextDecoder('gbk').decode(codes)


            // 编码表

            const table = new Uint16Array(65536)

            for (let i = 0; i < cstr.length; i++) {

                table[cstr.charCodeAt(i)] = codes[i]

            }

            const buf = new Uint8Array(str.length * 2)

            let n = 0


            for (let i = 0; i < str.length; i++) {

                const code = str.charCodeAt(i)

                if (code < 0x80) {

                    buf[n++] = code

                } else {

                    const gbk = table[code]

                    buf[n++] = gbk & 0xFF

                    buf[n++] = gbk >> 8

                }

            }

            u8buf = buf.subarray(0, n)

            // console.log(u8buf);

            return u8buf

        }


        async function printAgain() {

            // Connect to the GATT server

            server = await device.gatt.connect();

            logMessage("Connected to GATT server.");


            // Get the printer service

            service = await server.getPrimaryService(uuid); // Replace with your printer's service UUID

            logMessage("Printer service retrieved.");


            // Get the characteristic for writing data

            characteristic = await service.getCharacteristic(characteristicUuid); // Replace with the correct characteristic UUID

            logMessage("Printer characteristic retrieved.");


            // Prepare test print data

            const encoder = new TextEncoder();

            const testData = encoder.encode("TEST PRINT: Hello from Web Bluetooth!\n");

            const finalData = encoder.encode("--\n--\n \n \n");


            const setFontSize = new Uint8Array([0x1D, 0x21, 0x11]); // GS ! n

            const setFontSize2 = new Uint8Array([0x1D, 0x21, 0x22]); // GS ! n

            const setFontSize3 = new Uint8Array([0x1D, 0x21, 0x33]); // GS ! n


            // Write test data to the printer

            logMessage("Sending test data to printer...");


            await characteristic.writeValue(new Uint8Array([0x1D, 0x21, 0x00]));

            await characteristic.writeValue(encoder.encode("1x1!\n"));

            await characteristic.writeValue(setFontSize);

            await characteristic.writeValue(encoder.encode("2x2!\n"));

            await characteristic.writeValue(setFontSize2);

            await characteristic.writeValue(encoder.encode("3x3!\n"));

            await characteristic.writeValue(setFontSize3);

            await characteristic.writeValue(encoder.encode("4x4!\n"));


            const initPrinter = new Uint8Array([0x1B, 0x40]); // ESC @

            await characteristic.writeValue(initPrinter);


            // 3. 設置字符集為 GBK

            const setGBK = new Uint8Array([0x1B, 0x74, 0x11]); // ESC t 0x11 (GBK)

            await characteristic.writeValue(setGBK);


            const text = "繁體中文測試\n \n";

            const encodedText = stringToGbk(text);

            await characteristic.writeValue(encodedText);

            logMessage("Test data sent successfully!");


            // QrCode 列印

            const qrData = "https://example.com"; // Your QR code data

            const qrDataLength = qrData.length + 3;

            const pL = qrDataLength & 0xFF; // Low byte

            const pH = (qrDataLength >> 8) & 0xFF; // High byte


            const commands = [

                0x1B, 0x40, // Initialize printer

                0x1D, 0x28, 0x6B, pL, pH, 0x31, 0x50, 0x30, ...new TextEncoder().encode(qrData), // Store data

                0x1D, 0x28, 0x6B, 0x03, 0x00, 0x31, 0x51, 0x30 // Print QR code

            ];


            const buffer = new Uint8Array(commands);

            await characteristic.writeValue(buffer);

            logMessage("QrCode sent successfully!");


            await characteristic.writeValue(finalData);

            logMessage("finalData sent successfully!");


            // Disconnect the GATT server

            server.disconnect();

            logMessage("Disconnected from printer.");

        }


        // Bind the function to the button

        document.getElementById('printTestButton').addEventListener('click', connectAndTestPrint);

        document.getElementById('printAgain').addEventListener('click', printAgain);

    </script>

</body>

</html>
Bike, 2025/1/2 下午 02:20:15
簡易執行方式
1. 確定Program.cs有加上Su.Encryption.AesEncryptor.InitAesPaddingEncryptor(secret , iv , encKey , dataRoot)
2. 確定appsettings.json有設定變數,DataRoot、EnvironmentEncKey
3. 先執行一次,會報錯誤,在dataRoot位置會產生一組$"{encKey}.ps1,裡面會放設定環境變數的指令
4. 設定完,記得把 $"{encKey}.ps1檔案刪除
===以上,設定完環境變數===
1. 確定Program.cs有加上Dictionary<string, string> encSetting = Su.Encryption.GetDecryptedSetting
2. 確定appsettings.json有設定變數,DataRoot、EnvironmentEncKey , ShowEncSetting 設定為 false
3. 在 $"{dataRoot}\Config\XXXX_dec.json"設定DBC連線,要注意連線字串要加上 "TrustServerCertificate=true;",因為.net Core一定要藥用SSL連線
4. 設定完之後,在執行一次,會自動產生XXXX.json
5. 刪除XXXX_dec.json
===以上,產生完加密DBC連線
備註,要取回解密連線字串,appsettings.json有設定變數 , ShowEncSetting 設定為 true
概念解說
原本 >> config大多是明文,駭客可以藉由偷到config來知道變數設定,例如 dbc連線資訊、某個APP Key
之後 >> 將重要資訊分成兩段,
appsettings.json >> 放可公開資訊的設定,例如 DataRoot、EnvironmentEncKey
在環境變數加上一個 由本機產生的隨機變數
讓本機的所有
原理說明
1. .Net Core 啟動時最先執行檔案 Program.cs,在一開頭先檢查本機是否有設定環境變數
緯中用的function Su.Encryption.AesEncryptor.InitAesPaddingEncryptor(secret , iv , encKey , dataRoot)
進階加密標準(英語:Advanced Encryption Standard,縮寫:AES)
沒有的話,會在 dataRoot 這邊產生一個 encKey.ps1的檔案,裡面放有環境變數設定的指令
(encSecretAndIv = Su.Encryption.AesEncryptor.Encrypt(envSecret, envIv, Su.TextFns.GetRandomString(48));
var command = $"[Environment]::SetEnvironmentVariable('{variableName}', '{encSecretAndIv}', 'Machine')";)
(隨機產生48碼亂數,(前32碼為本機專用Secret、後16碼為iv),進行aes加密)
Doug, 2023/6/17 下午 12:04:28
這個指令還是會把所有的資料 Select 出來,再更新
原指令:
UPDATE Job Set En_Status = 200 Where En_Status = 100 and LastTouchAt < '2023-05-06 12:34:56'
其中 '2023-05-06 12:34:56' 是 DateTime.Now.AddMinutes(-2) 的結果(Web Server 端的時間扣 2 分鐘)
但,若是改使用 UpdateFromQueryAsync 如下:
var c = await Ds.NewContext.GvContext.Jobs.Where(j => j.En_Status == Cst.Job.Status.Running && j.LastTouchAt < DateTime.Now.AddMinutes(-2))
.UpdateFromQueryAsync(j => new Ds.Gv.Job { En_Status = Cst.Job.Status.ReStarting });
產生的 SQL 如下:
UPDATE A
SET A.[En_Status] = @zzz_BatchUpdate_0
FROM [Job] AS A
INNER JOIN ( SELECT [j].[Id], [j].[CancelledAt], [j].[CancelledBy], [j].[En_Status], [j].[EndAt], [j].[Exception], [j].[Filename], [j].[InformationJson], [j].[InitAt], [j].[Is_CheckOnly], [j].[LastTouchAt], [j].[LastTouchMessage], [j].[LoopStartAt], [j].[Name], [j].[ScheduleId], [j].[TotalTouch], [j].[TouchCount]
FROM [Job] AS [j]
WHERE [j].[En_Status] = 100 AND [j].[LastTouchAt] < DATEADD(minute, CAST(-2.0E0 AS int), GETDATE())
) AS B ON A.[Id] = B.[Id]
有兩個要注意的地方:
1. 它會先 Select 全欄位,再做更新
2. 它的時間是 DB Server 的現在時間。不是 Web Server 端的時間。
順便記錄一下。若是要執行 Update xx Ser cc = cc + 1 Where ...
EF 可寫為:
var c = await Ds.NewContext.GvContext.Jobs.Where(j => j.En_Status == Cst.Job.Status.Running && j.LastTouchAt < DateTime.Now.AddMinutes(-2))
.UpdateFromQueryAsync(j => new Ds.Gv.Job { TotalTouch = j.TotalTouch + 1 });
轉換的 SQL 為:
UPDATE A
SET A.[TotalTouch] = B.[TotalTouch] + 1
FROM [Job] AS A
INNER JOIN ( SELECT [j].[Id], [j].[CancelledAt], [j].[CancelledBy], [j].[En_Status], [j].[EndAt], [j].[Exception], [j].[Filename], [j].[InformationJson], [j].[InitAt], [j].[Is_CheckOnly], [j].[LastTouchAt], [j].[LastTouchMessage], [j].[LoopStartAt], [j].[Name], [j].[ScheduleId], [j].[TotalTouch], [j].[TouchCount]
FROM [Job] AS [j]
WHERE [j].[En_Status] = 100 AND [j].[LastTouchAt] < DATEADD(minute, CAST(-2.0E0 AS int), GETDATE())
) AS B ON A.[Id] = B.[Id]
Bike, 2023/4/29 下午 08:44:31
我們會使用 Validation Attribute 來客製化 Validation 的輸出結果,但在 .Net 7 的專案突然失效了。原因是 [ApiController] 會自動回傳 400 錯誤,攔截了 Validation Attribution 的執行。
解決方法, 在 program.cs 中加上以下的程式碼:
builder.Services.Configure<ApiBehaviorOptions>(options
=> options.SuppressModelStateInvalidFilter = true);
解決方法, 在 program.cs 中加上以下的程式碼:
builder.Services.Configure<ApiBehaviorOptions>(options
=> options.SuppressModelStateInvalidFilter = true);
Bike, 2023/3/2 下午 03:27:53
試了這兩個 Sample:
https://learn.microsoft.com/en-us/training/modules/store-local-data/4-exercise-store-data-locally-with-sqlite
和
https://blazorhelpwebsite.com/ViewBlogPost/61
結果專案在 Windows 環境下都可以正常執行,但切換到 Android Emulator 就無法存檔。
在查了很多資料後,發現需要裝額外的 Package,需安裝的 Package 如下:
其它的發現為:
1. 雙點專案,就可以開啟 csproj 檔案。下方的 ItemGroup 就是已安裝的 package
2. 可以把 chrome 連接到 Android Emulator 的方法,在網址列輸入以下指令:
chrome://inspect/#devices
https://learn.microsoft.com/en-us/training/modules/store-local-data/4-exercise-store-data-locally-with-sqlite
和
https://blazorhelpwebsite.com/ViewBlogPost/61
結果專案在 Windows 環境下都可以正常執行,但切換到 Android Emulator 就無法存檔。
在查了很多資料後,發現需要裝額外的 Package,需安裝的 Package 如下:
    <ItemGroup>

     <PackageReference Include="sqlite-net-pcl" Version="1.8.116" />

     <PackageReference Include="SQLiteNetExtensions.Async" Version="2.1.0" />

     <PackageReference Include="SQLitePCLRaw.bundle_green" Version="2.1.4" />

     <PackageReference Include="SQLitePCLRaw.core" Version="2.1.4" />

     <PackageReference Include="SQLitePCLRaw.lib.e_sqlite3" Version="2.1.4" />

     <PackageReference Include="SQLitePCLRaw.provider.dynamic_cdecl" Version="2.1.4" />

     <PackageReference Include="System.Data.DataSetExtensions" Version="4.5.0" />

    </ItemGroup>
其它的發現為:
1. 雙點專案,就可以開啟 csproj 檔案。下方的 ItemGroup 就是已安裝的 package
2. 可以把 chrome 連接到 Android Emulator 的方法,在網址列輸入以下指令:
chrome://inspect/#devices
Bike, 2023/2/12 下午 05:09:11
產生 FileStreamResult 物件的 function 如下: (目前置於 SU 之中,以便轉移)
輸出用的 Controller 和 Action 如下:
        static List<Brush> CaptchaBrushes = null;

        public static FileStreamResult CreateCaptcha(string captcha)

        {

            if (CaptchaBrushes == null)

            {

                CaptchaBrushes = new List<Brush>();

                CaptchaBrushes.Add(Brushes.White);

                CaptchaBrushes.Add(Brushes.Gold);

                CaptchaBrushes.Add(Brushes.LightSkyBlue);

                CaptchaBrushes.Add(Brushes.LimeGreen);

                CaptchaBrushes.Add(Brushes.AliceBlue);

                CaptchaBrushes.Add(Brushes.AntiqueWhite);

                CaptchaBrushes.Add(Brushes.BurlyWood);

                CaptchaBrushes.Add(Brushes.Silver);

            }


            int width = 90;

            int height = 45;


            //https://stackoverflow.com/questions/61365732/cannot-access-a-closed-stream-when-returning-filestreamresult-from-c-sharp-netc

            //Using statements close and unload the variable from memory set in the using statement which is why you are getting an error trying to access a closed memory stream.You don't need to use a using statement if you are just going to return the result at the end.


            //這個 memory stream 不用關閉或 dispose

            var ms = new MemoryStream();


            // 釋放所有在 GDI+ 所佔用的記憶體空間 ( 非常重要!! )

            using (Bitmap _bmp = new Bitmap(width, height))

            using (Graphics _graphics = Graphics.FromImage(_bmp))

            using (Font _font = new Font("Courier New", 24, FontStyle.Bold)) // _font 設定要出現在圖片上的文字字型、大小與樣式

            {

                // (封裝 GDI+ 繪圖介面) 所有繪圖作業都需透過 Graphics 物件進行操作

                _graphics.Clear(Color.Black);


                // 如果想啟用「反鋸齒」功能,可以將以下這行取消註解

                //_graphics.TextRenderingHint = TextRenderingHint.AntiAlias;


                // 將亂碼字串「繪製」到之前產生的 Graphics 「繪圖板」上

                var x = 10;

                for(var i = 0; i < captcha.Length; i++)

                {

                    _graphics.DrawString(captcha.Substring(i, 1), _font, CaptchaBrushes[Su.MathUtil.GetRandomInt(CaptchaBrushes.Count)], x, Su.MathUtil.GetRandomInt(15));

                    x += 10 + Su.MathUtil.GetRandomInt(10);

                }


                // 畫線


                _graphics.DrawLine(new Pen(CaptchaBrushes[Su.MathUtil.GetRandomInt(CaptchaBrushes.Count)], 1),

                    Su.MathUtil.GetRandomInt(0, Convert.ToInt32((width * 0.9 / 2))), 0, Su.MathUtil.GetRandomInt(Convert.ToInt32(width / 2), Convert.ToInt32(width * 1.9 / 2)), height);


                _graphics.DrawLine(new Pen(CaptchaBrushes[Su.MathUtil.GetRandomInt(CaptchaBrushes.Count)], 1),

                    Su.MathUtil.GetRandomInt(Convert.ToInt32(width / 2), Convert.ToInt32(width * 1.9 / 2)), 0, Su.MathUtil.GetRandomInt(0, Convert.ToInt32((width * 0.9 / 2))), height);


                _graphics.DrawLine(new Pen(CaptchaBrushes[Su.MathUtil.GetRandomInt(CaptchaBrushes.Count)], 1),

                    0,

                    Su.MathUtil.GetRandomInt(height / 2),

                    width,

                    height / 2 + Su.MathUtil.GetRandomInt(height / 2)

                    );


                _graphics.DrawLine(new Pen(CaptchaBrushes[Su.MathUtil.GetRandomInt(CaptchaBrushes.Count)], 1),

                 0,

                 height / 2 + Su.MathUtil.GetRandomInt(height / 2),

                 width,

                    Su.MathUtil.GetRandomInt(height / 2)

                 );


                _bmp.Save(ms, System.Drawing.Imaging.ImageFormat.Jpeg);

            }


            ms.Seek(0, SeekOrigin.Begin);


            // Controller 的型別為 FileResult

            return new FileStreamResult(ms, "image/jpeg")

            { FileDownloadName = $"{DateTime.Now.Ymdhmsf()}.jpg" };

        }
輸出用的 Controller 和 Action 如下:
namespace Web.Controllers

{

    public class CaptchaController : Controller

    {

        [Route("captcha")]

        public async Task<FileStreamResult> Index()

        {

            //產生 Captcha 並存入 Session 之中。目前是四位數字

            string captcha = (await Ah.ReGetAsync<object>("api/kol/create-captcha-code")).ToString();


            //產生圖檔並回傳 FileStreamResult

            return Su.Wu.CreateCaptcha(captcha);

        }

    }

}
Bike, 2022/9/25 下午 10:03:44
.net 6 在 model 中上傳日期字串時,如果遇到 "The JSON value could not be converted to System.Nullable`1[System.DateTime]" 這個錯誤,解決方法如下:
1. 安裝套件: Microsoft.AspNetCore.Mvc.NewtonsoftJson
2. 在 program.cs 中,原來來的
builder.Services.AddControllers()
改為 (其 options 的部份非必要)
builder.Services.AddControllers()
.AddNewtonsoftJson(options =>
{
options.SerializerSettings.ContractResolver = new Su.CamelCaseContractResolver();
});
1. 安裝套件: Microsoft.AspNetCore.Mvc.NewtonsoftJson
2. 在 program.cs 中,原來來的
builder.Services.AddControllers()
改為 (其 options 的部份非必要)
builder.Services.AddControllers()
.AddNewtonsoftJson(options =>
{
options.SerializerSettings.ContractResolver = new Su.CamelCaseContractResolver();
});
Bike, 2022/8/21 下午 10:12:43
在 Program.cs 由註冊的 Filter 會在 Action 或 Controller 註冊的 Filter 之前執行。
IOrderedFilter 也無法改變執行順序哦。
IOrderedFilter 也無法改變執行順序哦。
Bike, 2022/8/11 下午 05:34:47